")
")
")
")
")
")
")
")
")
")
")
")
")
")

Now Upgrade to V4.8A!
Click here to go to V4.8A link: https://www.pibot.com/pibot-fluidnc-grbl-cnc-controller-v4-8
This Rev4.6 will stop update, please go to the V4.8A page.
--------------------------------------------------
We have upgraded the board to V4.8A make it safer and more functional, such as adding optical isolation components.
You will get the new board is V4.8A and gift!
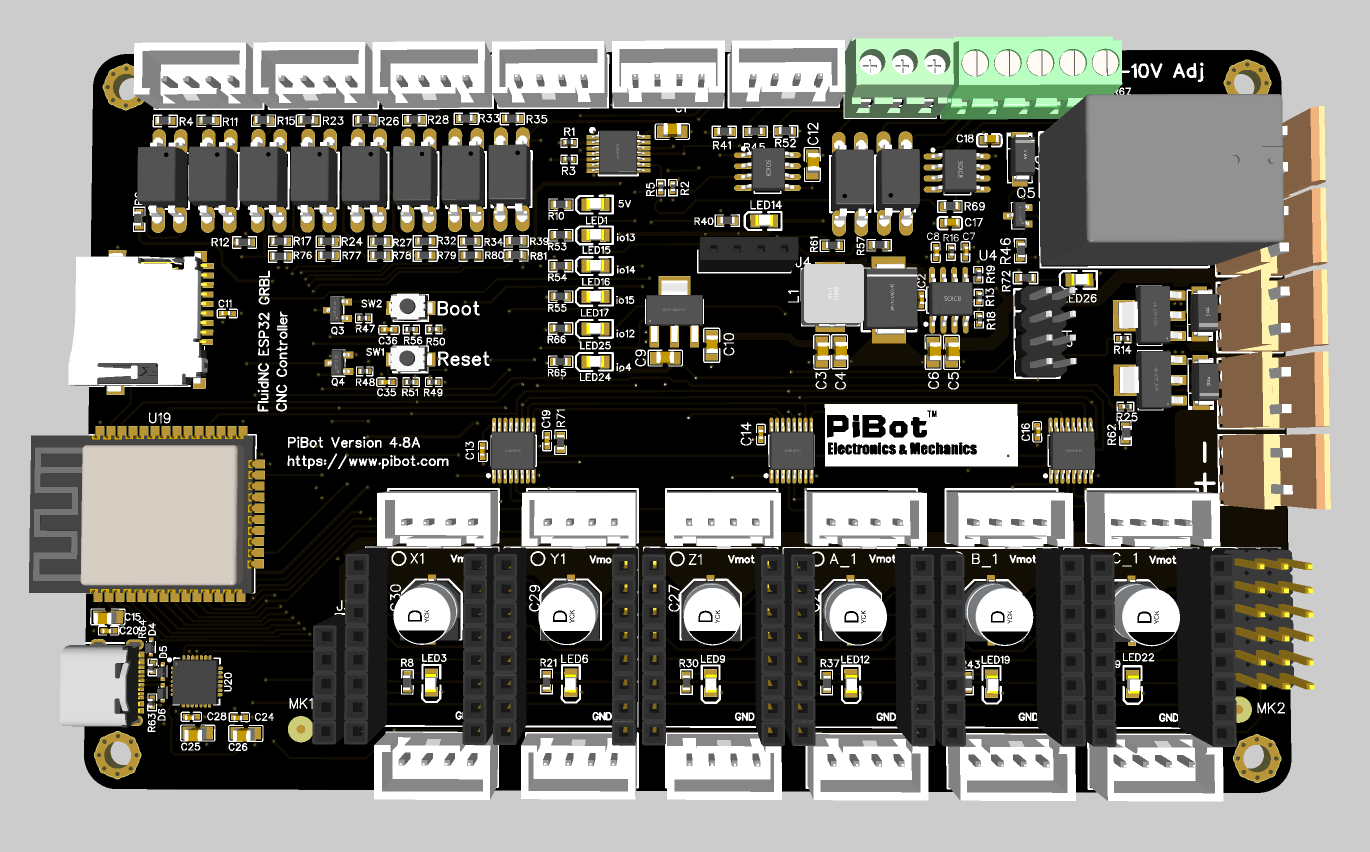
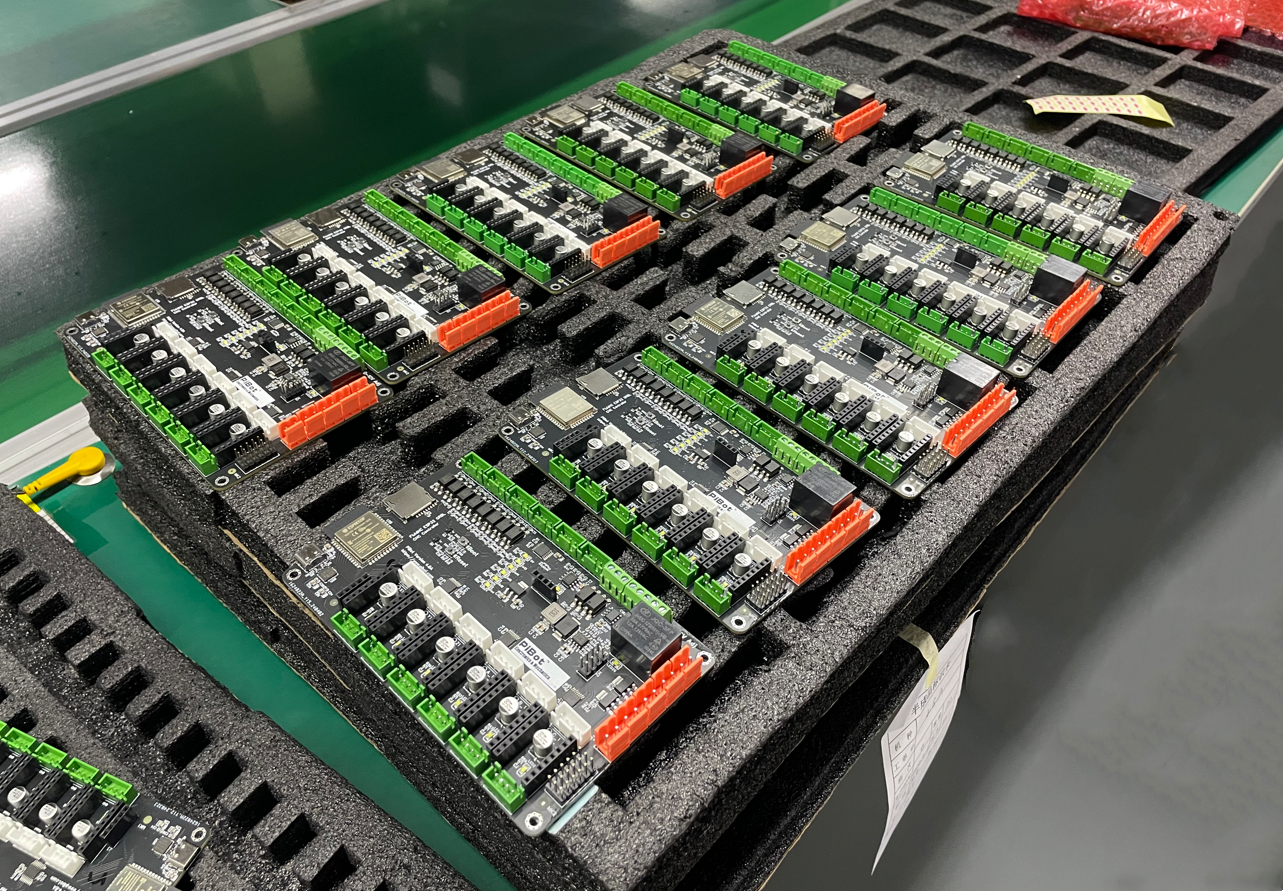
V4.8 First Batch Finished Produced
What is it
This was designed to control a wide variety of CNC machines. It can control 6 motors and many spindle and laser types. It is very easy to configure. You never have to compile any software. All configuration, upgrading, etc can be done via web browser.
Designed for Fluindc GRBL CNC.
Fully open source and well supported.
Compatible with the official original firmware, we provide yaml configuration file.
- PiBot FluidNC GRBL CNC Controller Board V4.8A Hardware Datasheet come soon..
Feature
- Integrated ESP32 (Programmed with FluidNC. Includes a generic configuration)
- (6) Motor connectors for external stepper drivers (5v signals). Each motor has separate step, direction and enable signals.
- Inputs for switches (limits, probes, control, etc)
- Communication Mode: USB Cable or Blue Tooth or WIFI
- Spindles (many types supported). Some multi-spindle arrangements are possible like RS485 & laser on the same machine.
- 0-10V controlled spindles with additional forward and reverse direction signals
- PWM Speed controllers with optional separate enable signals
- Relay (on/off) controlled spindles.
- BESC (Brushless Motor) based spindles
- Lasers with PWM and enable
- Unused spindle 5V outputs can be used for any output function (coolant, etc)
- Micro SD card socket for local storage of gcode files
- Module socket for GPIO extenders and Pendant interfaces.
- Compatible with PiBot Stepper Motor Driver Rev2.3 TOSHIBA TB6600 (3.3V 5V or Dgnd logic max Output 4.12 - 4.5A)
- Compatible with PiBot Isolated Relay Board Rev2.3
How it works
Step 0: Preparation: Download the following four files you need:
A. USB driver
B. ESP32 firmware
C. fluidnc web ui files: index.html and ico
D. YAML sample
Click here to download all at once.
https://www.pibot.com/dls/fluidnc/V48A-TEST-DOWNLOADS.zip
If you need the latest software version, please download the latest release version from the fluidnc official website. We are compatible.
(Note: A visual tutorial will be available soon.)
Step 1: Install USB driver
(1) Insert the file A prepared earlier into your computer.
(2) If not installed correctly, install manually.
(3) Open "My Computer," go to Device Manager, and navigate to COM ports.
(4) Update the driver, select "Install from Local," and choose all.
(5) After installation, a CP2102 will be displayed, remember this port number.
(Note: A visual tutorial will be available soon.)
Step 2: Upload fluidnc-grbl firmware (Firmware upload)
(0) Connect via Type-C to your mainboard and power with 12V or 24V (theoretically, 9-30V is acceptable).
(1) Insert file B prepared earlier into your computer.
(2) Double click to open the WiFi version.
(3) If successful, it will install automatically; if not, press the boot button for three seconds and release to trigger automatic download.
(4) After download, select option 5.
(5) Disconnect power, wait for five seconds, then reconnect and restart the MCU.
(Note: A visual tutorial will be available soon.)
Step 3: Upload files required for fluidnc-WEB interface (Install web UI)
(1) After restarting the MCU, you'll find fluidnc in your computer's WiFi network.
(2) Connect to it with password 12345678.
(3) Once connected, enter 192.168.0.1 in your browser.
(4) Upload the required files, do not interrupt the process.
(6) After upload, you'll see the option to enter the web-fluidnc interface.
(Note: A visual tutorial will be available soon.)
Step 4: Upload YAML configuration file required for CNC and configure your network (Configure your machine)
(1) Inside the interface, click here to proceed.
(2) Upload the YAML file you need for testing purposes. After testing, modify it according to your CNC requirements using this template.
(3) Click "Set" when done.
(3) Here, you can also configure your LAN access, refer to details.
(4) Disconnect power, wait for five seconds, then reconnect and restart the mainboard.
(6) The mainboard is now ready to work. If you have OLED, you can see basic information.
(Note: A visual tutorial will be available soon.)
Step 5: Test the mainboard without connecting hardware (Testing)
(1) Open the web page.
(2) Click the unlock button.
(3) Enter M6 to display the default tool, T0 as a relay.
(4) Enter M6 T0 to test PWM.
Enter M3 S255, you will hear a ticking sound, indicating it has started working.
Enter command M5 to stop.
(5) Enter M6 T1 to test PWM.
You will see IO port xxx blinking.
(6) Enter M6 T2 to test Laser.
You will see IO port xxx blinking.
(7) Enter M6 T3 to test 485.
You will see IO port xxx blinking.
(Note: A visual tutorial will be available soon.)
Advanced Test Three: Use OpenBuild controller to test limit switch triggering.
Advanced Test Four: Use OLED to test limit switch triggering.
Advanced Test One: If you connect an oscilloscope, you will see the PWM waveform changing.
Advanced Test Two: If you connect a frequency converter, you will see the register value changing.
(Note: A visual tutorial will be available soon.)
Step 6: Hardware Connection
(1) Mainboard pinout diagram.
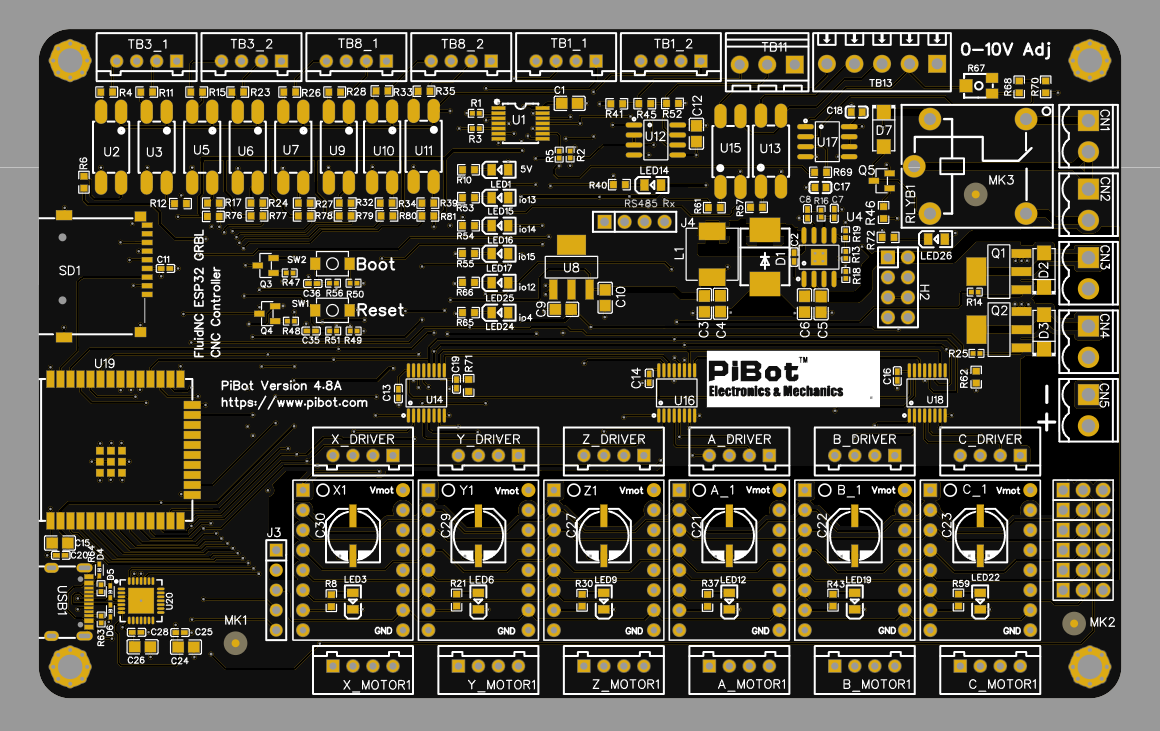
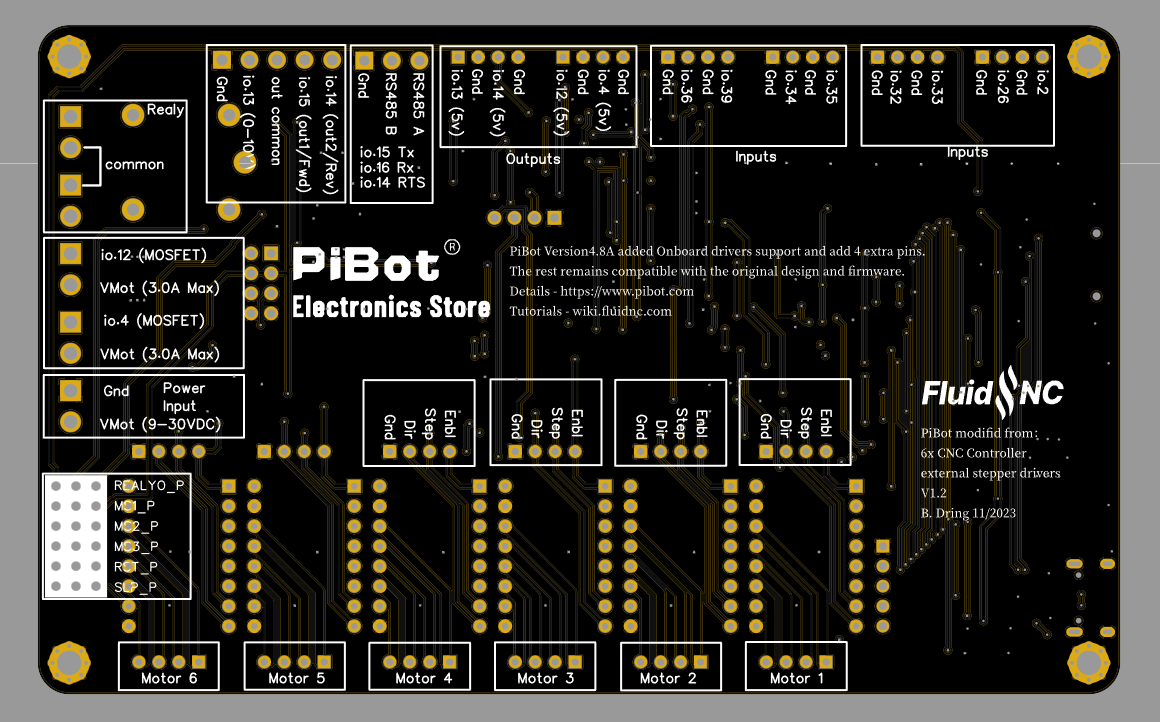
(2) Internal drive schematic (using the YAML provided earlier as a sample)
A. By default, GPIO 26 serves as a relay input. You can also change its jumper to use it for input. Insert on the left for relay operation and insert on the right for terminal operation.
B. Stepper motor drive pin jumper settings as shown in the diagram:
(Note: A visual tutorial will be available soon.)
(3) External drive schematic (using the YAML provided earlier as a sample)
A. It is recommended to use an independent power supply for external power.
B. Compatible with hardware REV2.3 relay.
C. Compatible with hardware REV2.3 stepper motor.
(Note: A visual tutorial will be available soon.)
Others:
File One: Board size.

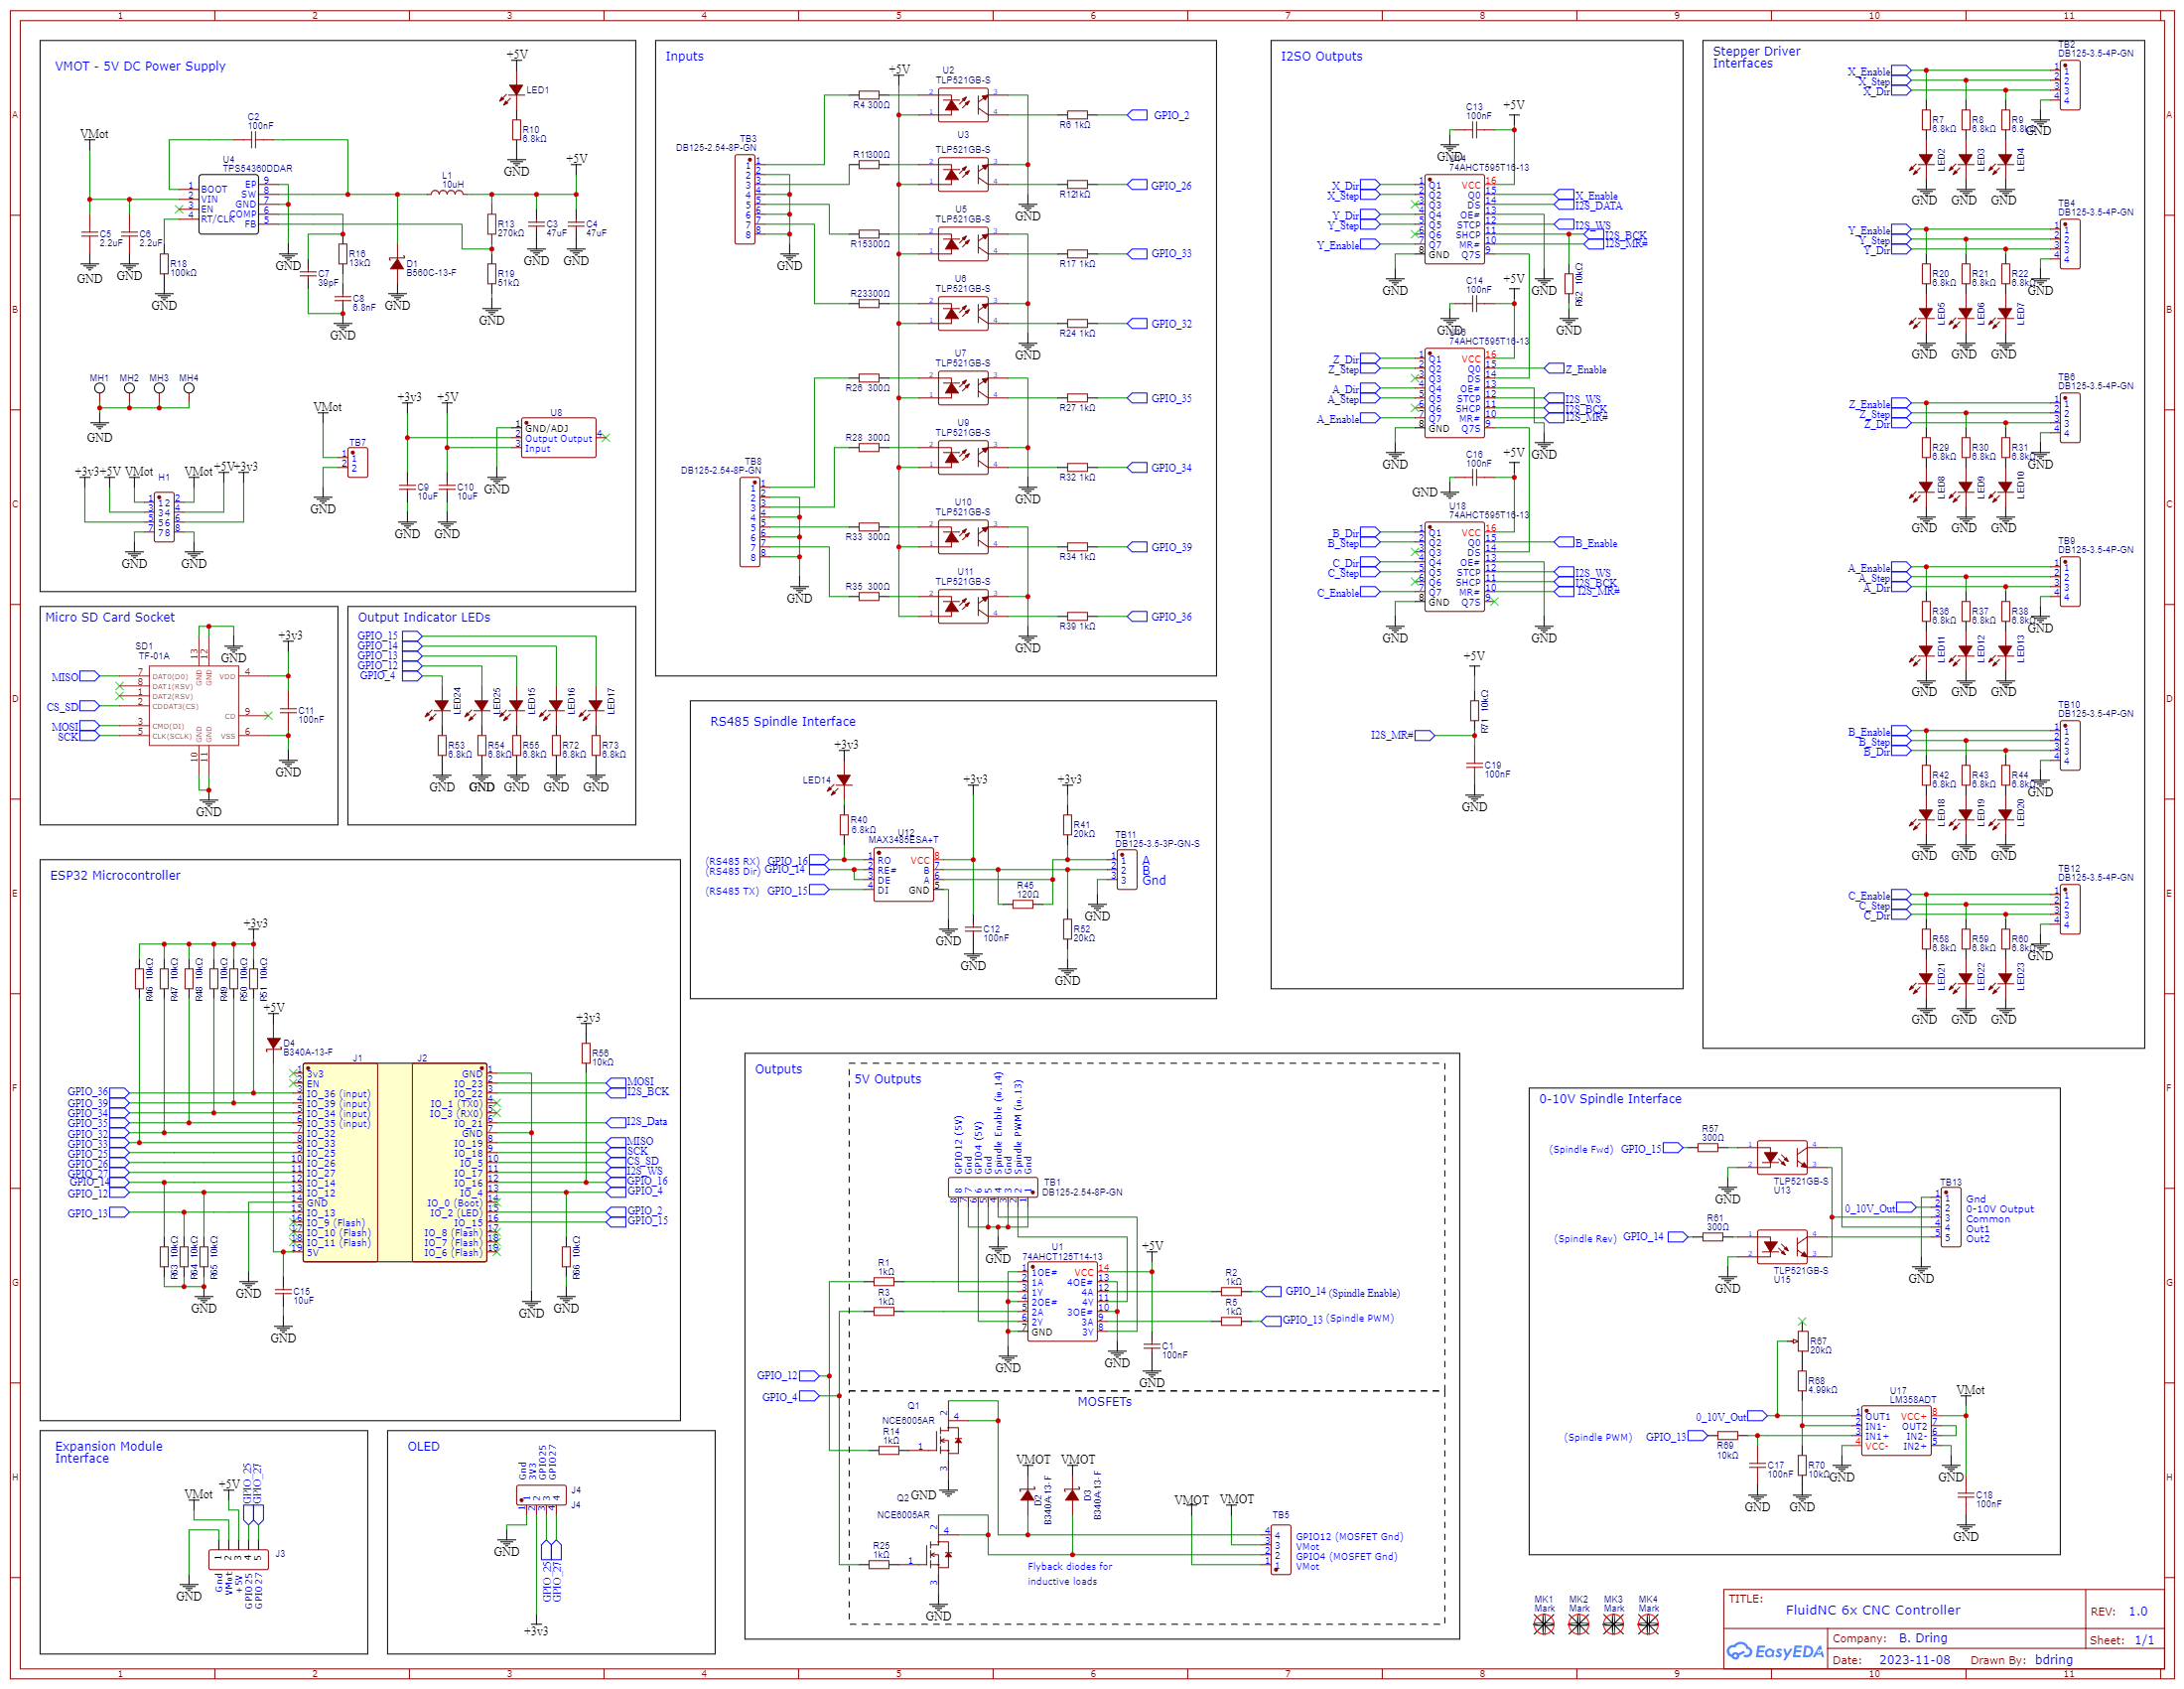
File One: Schematic diagram.
Shipping List
- PiBot FluidNC GRBL CNC Controller Board Rev4.8A × 1
- EndStops x 3
")
")
")
")
")
")
")
")
")
")
")