After connect the electronics, configure the related parameter in the firmware and upload to the controller board, then make the machine works correctly.
Following the steps can learn how to modify the firmware and upload to the controller board.
- Download the Firmware and Upload Tools
- Prepare the Parameter According to your Hardware and mechanics
- Configure the Paremeter in "OnePageConfigure.h"
- Upload the Firmware to The Controller Board
Video
Step 1 : Download the Firmware and Upload Tools
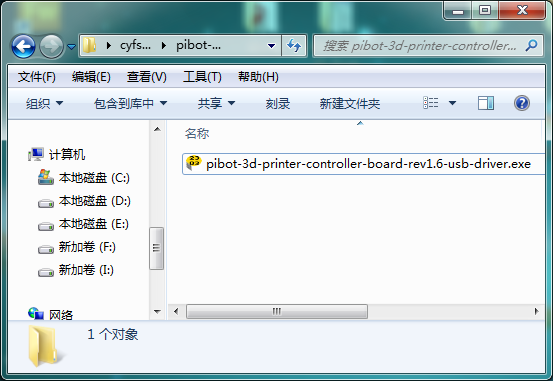
PiBot 3D Printer Controller Board USB Driver Click Here for Download
The PiBot 3D Printer software have integrate the USB driver for controller board rev1.x, if you have install the software,you don't need install the driver again.
https://www.pibot.com/downloads-pibot-controller-board-usb-driver
PiBot 3D Printer Firmware Click Here for Download
Only need configure All parameter in one-page--”OnePageConfigure.h”.
https://www.pibot.com/downloads-pibot-3d-printer-firmware-and-upload-tool
Firmware Upload Tools Click Here for Download
Please use this version to upload your Firmware then you don't need to modifying anything.
Step 2 : Prepare the Parameter According to Your Electronics and Mechanics
A : Printing Size
The X Y Z length (unit mm), for example: X-240mm Y-230mm Z-160mm.
- X_MAX_LENGTH 240
- Y_MAX_LENGTH 230
- Z_MAX_LENGTH 160
B : Steps per mm
Used for XYZ axiz move correct distance.
Depend on the stepper-motor, stepper-motor-driver, Tooth Timing Pulley, leadscrew used in the machine.
For example:
- Stepper Motor - Step angel: 1.8°
- Stepper-motor-driver - microstepping: 1/16
- Tooth Timing Pulley - Model:GT2 Tooth: 20
- Lead Screw - Screw diameter: 16mm Leads: 4mm
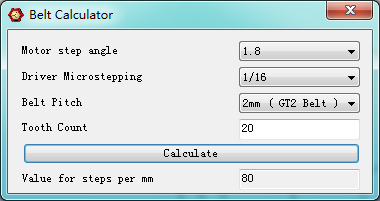
For X Y which use the Pulley.open the PiBot 3d printer software select --> menu --> Tools --> Belt Calculator.put the parameters,
For Z which use the Leadscrew. open the PiBot 3d printer software select --> menu --> Tools --> Leadscrew Calculator
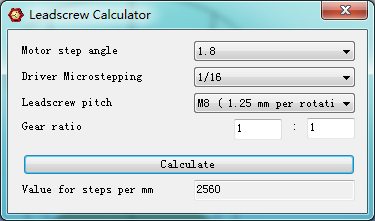
Now you have get the steps per mm parameters
- XAXIS_STEPS_PER_MM 80
- YAXIS_STEPS_PER_MM 80
- ZAXIS_STEPS_PER_MM 2560
C : Direction of Your Motor Movement
When you find your X Y Z move opposite direction, change the parameters for false or true.
- NIVERT_X_DIR false // or true
- NIVERT_X_DIR false // or true
- NIVERT_X_DIR false // or true
D : Endstops
Friendly way to select the parameters of model and numbers.
- MODEL_ENDSTOP optical // or mechanical
- NUM_ENDSTOP three // or six
E : Extruder
Number of extruder - 1 or 2, and the steps per mm for extruder, you need get this from the vendor, the default is the pibot extruder, if the motor rotate wrong way, inverse it.
- NUM_EXTRUDER 1 // or 2
- EXT0_STEPS_PER_MM 120
- EXT1_STEPS_PER_MM 120
- EXT0_INVERSE true // or false
- EXT1_INVERSE true // or false
F : Buliding Platform
If you want to use the heatbed, set parameter to true.
- HAVE_HEATED_BED false // or true
G : LCD Display Information
The words Display In LCD, put your machine name in this, but not too long.
- UI_PRINTER_NAME “PiBot3DPrinter”
- UI_PRINTER_COMPANY "BanDao"
- DispReady "PiBot ready"
- DispIdel "PiBot idel"
H : Delta 3D Printer Configuration
Skip This, If You Don’t Build The Delta Printer. if your build the delta printer, set the parameter.
- DELTA_PRINTER false // or true
- DELTA_AXIS_STEPS_PER_MM 80
- DELTA_RADIUS 170
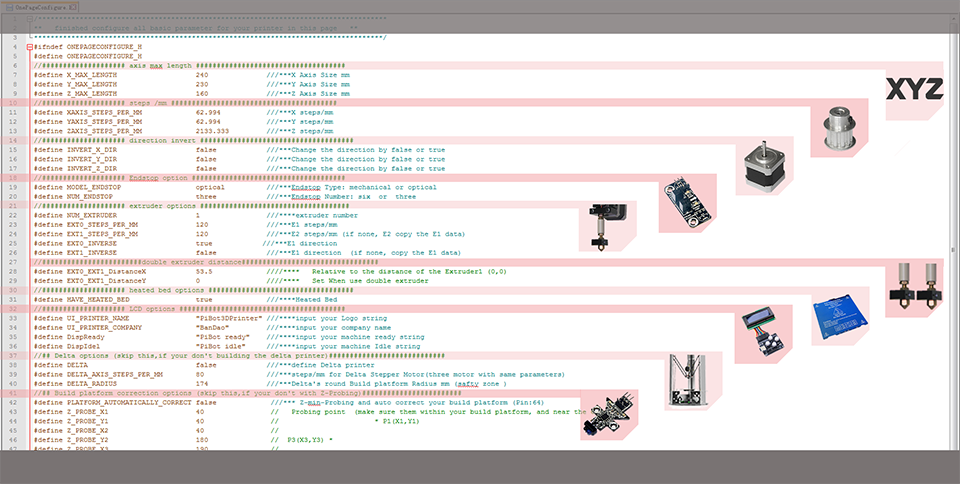
Step 3 : Configure the Paremeter in "OnePageConfigure.h"
Now,unzip the files of firmware to a folder.
And find the file named "OnePageConfigure.h".
Edit the parameters in this page which your just preparing above and save it. (Notepad++ recommended for editor tools)
Step 4 : Upload the Firmware to The Controller Board
1, Unzip the Three Files to Separately Floders
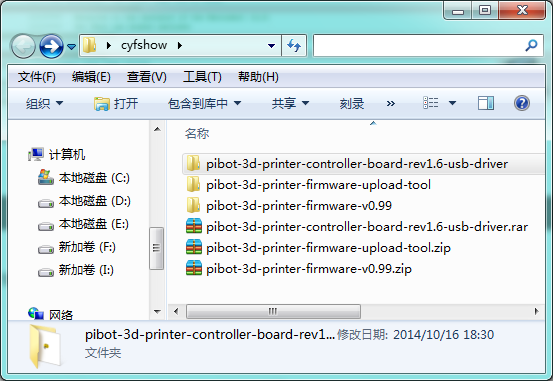
2, Install the  Controller Coard USB Driver then Connect the Controller Coard to Computer via USB Wire
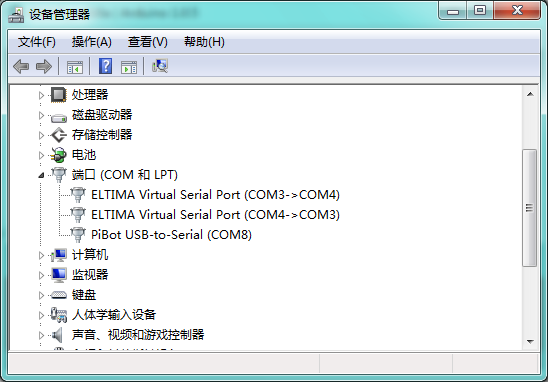
3, Check the COM Port Number in Device Manager.
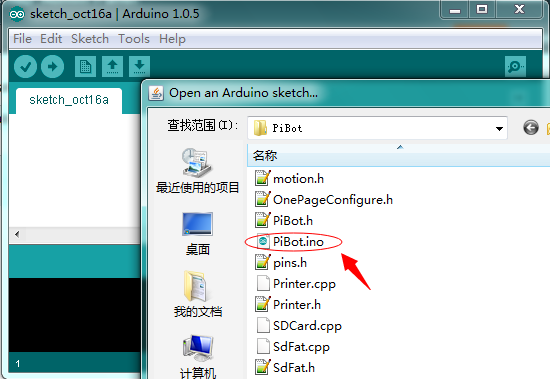
4, Run the PiBot Modify Version "arduino.exe" in the Upload tool Folder and Open the PiBot.ino which in the Firmware Folder
5, Select the COM which You Have Checked in Device Manager before
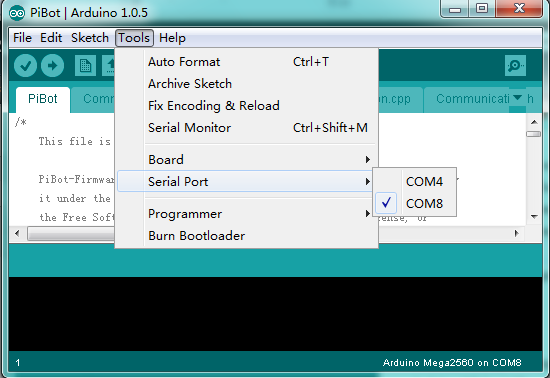
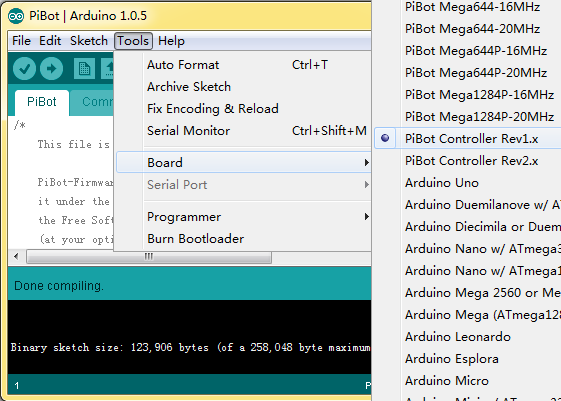
6, Select the Board - PiBot Controller Rev1.x
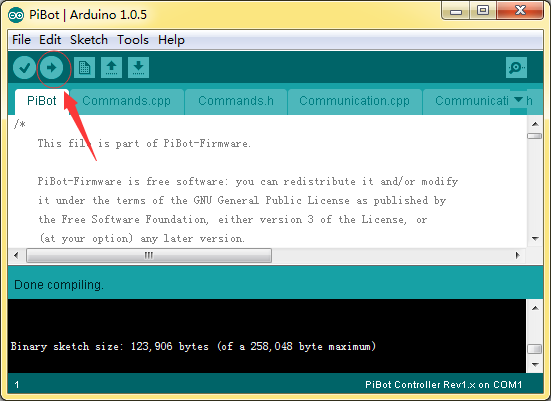
7, Verify and Upload the Firmware to the Board
Congratuation! You Have Finished Configure Your Firmware
